So you have recently found out about the new digital art form, collectible NFTs? You might have seen them being traded on exchanges and wondered how people had managed to create such intricate art (and make a lot of money in the process).
These days, it seems like everyone is talking about the NFT market and some really big companies are getting involved to try to cash-in. How do they afford all those expensive GPUs for rendering big files? And why is there such an insane amount of money to be made – have you seen the Bored Ape Yacht Club collection? Is NFT art really that valuable?
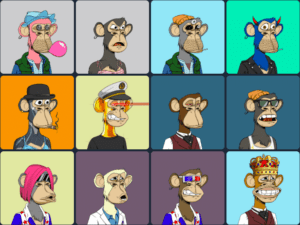 We believe that everyone should be able to create their own NFTs, not only the people who have 5+ GPUs in their basements or has the skills to use all of the programs in Adobe Creative Cloud toolkit. So I have created this simple 4-step guide to creating your own art in Adobe Photohop from a simple self-portrait.
(Note: There are many free programs available, but I wanted to use Photoshop as an example because they will soon be adding a “prepare as NFT button” to their program.)
So, let’s get started!
Step 1: get the images you want to work with
First of all, you will need an image to create your NFT. For the sake of simplicity, let’s use a high-quality picture of yourself, so nothing too small or blurry. A selfie with a newer smartphone will do, too!
Here’s an example:
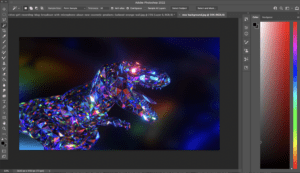
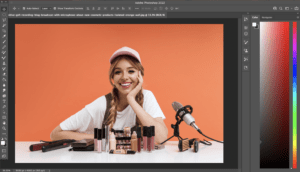 The next step is to find (or create) a snazzy background that you will use later to place either behind or in front of your self-portrait image over it in the editing program. You can use any image for this, but I recommend finding a high-quality, royalty-free pic from sites like FreePik or Unsplash.
Here’s an example of a royalty-free image I found that I wanted to use for this project:
Step 2: open your image in your editing program and select a cut-out mode
Now comes the fun part: cut out the background from your self-portrait to prep it for the new background. I will be using Photoshop in this article, but you can use any free digital art program you like.
Your image editing software should offer a mode that allows you to separate the cut-out portion of your picture from the background by using the “Select Subject” tool, “Erase” tool, or something similar – usually called “Background Eraser”).
If your program doesn’t offer such a mode, you can use the “magic wand” tool to select an area of similar color and fill it in black (using Edit -> Fill in Photoshop). This takes a lot more time; so, try to use the “Select Subject” tool or something like it first.
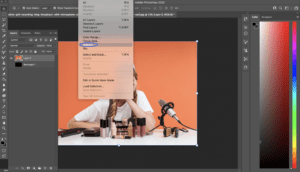
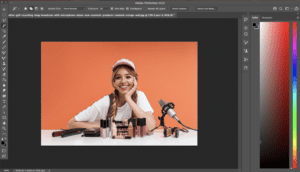
Then, simply select the eraser tool to erase away everything but your cut-out portion or press “delete” on your keyboard. (Note: if you accidentally cut out the part of the image you wanted to save, press undo, and while the area is still highlighted, go to “Select” > “Inverse” and press delete again to eliminate the background you were trying to remove in the first place!)
Once your background is gone, the picture should look a little like this:
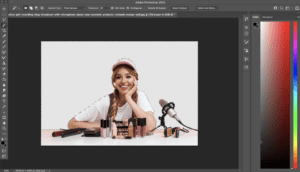
Step 3: place it new background image behind your self-portrait cut-out
Now that you have your cut-out image in front of you, it is time to replace the background for it. Select the background image and press copy; then go to the cut-out image window to add a new layer and paste it.
Then, click on the “Layers” window and add a new layer. Last, click on the empty layer in the “Layers” window, and then press “paste”. (If you want to be “extra”. You can paste the new layer image in front of your cut-out layer and make the new top layer semi transparent.)
Here’s an example of what the new image will look like:
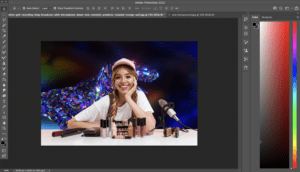
Step 4: use some sort of filters to add some flare to your new NFT
The last step is to add some sort of filters or colorization if you think that your image would look better with them. This can be done manually or automatically with filters.
For this example, I selected the top (cut-out) layer, and then went to “Posterize” (level 2), and then “Channel Mixer” and adjusted the red, blue, and green for each of the output channels until I found a color combination I liked.
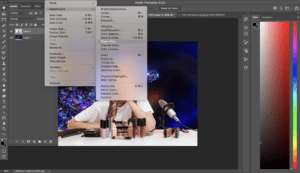
Here’s what it looks like after the filters were applied:
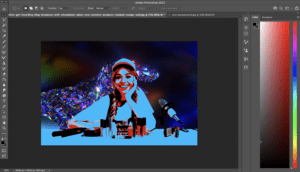
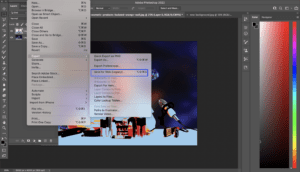
Now you simply need to save your image in a .png format and export it as an NFT. I like to use Save for Web because I like the interface for the different save-out options (personal preference), but Quick Export to PNG will work just fine, as well.
Happy dance time: you just made your first NFT
Time to show everyone you know that you are a bonafide, real NFT creator. You did it!
Now that you’ve made your first NFT, you have an asset that you can sell or trade. When you’re ready to start trading, we have a quick start guide that you might find useful, too.
If you liked this guide, too, please share it with your friends who might also be interested in making their own NFTs. Or you could even write an article like this yourself about your experience making NFTs…


